Microsoft suite – Microsoft Suite: Seriously, who
-hasn’t* wrestled with a Word doc at 3 AM trying to meet a deadline? This isn’t just about knowing the basics; we’re diving deep into the Microsoft Suite, exploring its evolution, comparing versions (because, let’s face it, Home & Student vs. 365 is a whole other ballgame), and mastering the power tools hidden within Word, Excel, PowerPoint, and Outlook.
Get ready to level up your productivity game.
We’ll cover everything from crafting killer presentations that actually keep your audience awake to conquering Excel spreadsheets like a data ninja. Think of this as your ultimate guide to unlocking the full potential of the Microsoft Suite – no more staring blankly at a blinking cursor! We’ll explore the history, compare different versions, and walk you through practical applications of each program, showing you how to integrate them for maximum efficiency.
Plus, we’ll tackle security and privacy concerns, because nobody wants a rogue email to derail their semester.
Microsoft Suite Overview
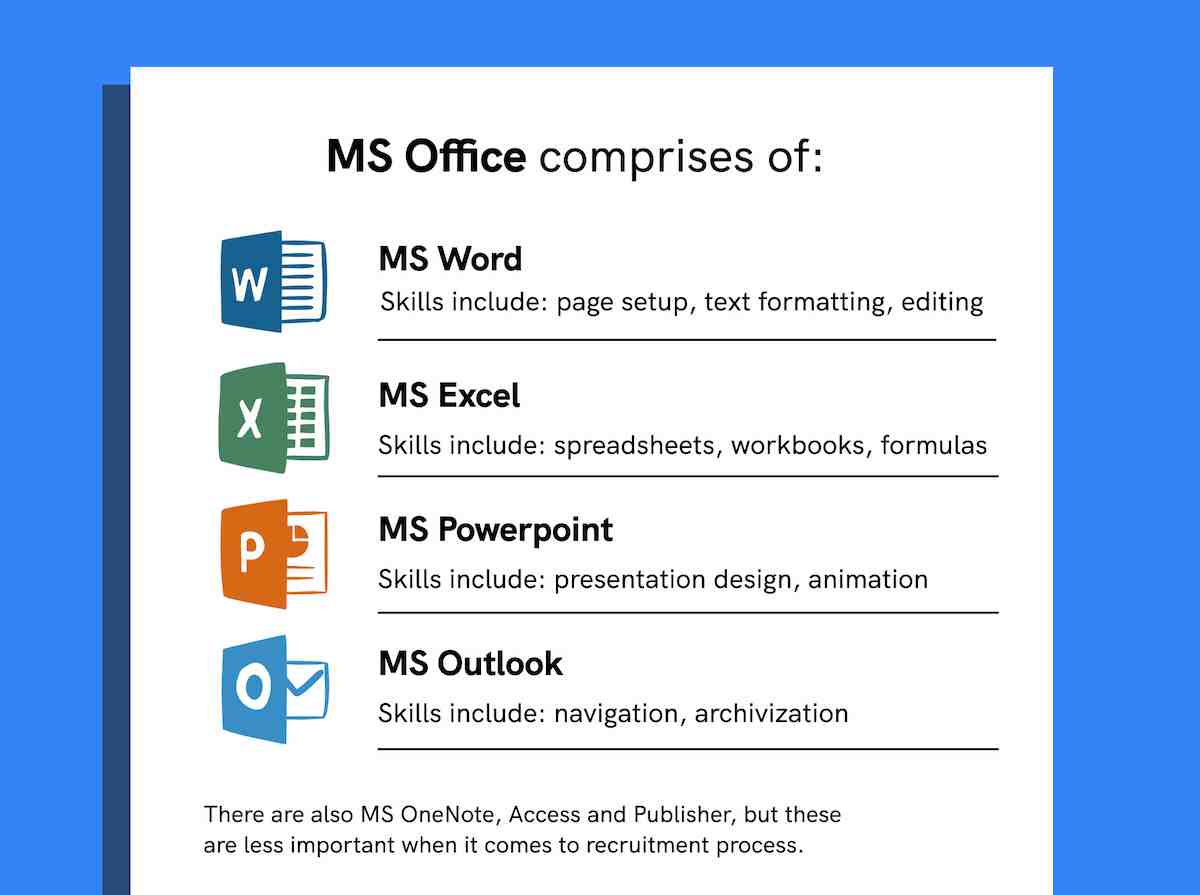
The Microsoft Office suite is a collection of productivity applications designed to help individuals and businesses manage information, create documents, and enhance overall efficiency. It’s become a ubiquitous tool in offices, schools, and homes worldwide, shaping how we work and communicate digitally.The core applications included in the standard Microsoft Suite have evolved over time, but generally include Word, Excel, PowerPoint, and Outlook.
Word is the word processor, used for creating and editing documents; Excel is the spreadsheet application for data analysis and manipulation; PowerPoint allows for the creation of presentations; and Outlook manages email, calendars, and contacts. Other applications, like Access (database management) and Publisher (desktop publishing), are often included in more comprehensive versions of the suite.
Core Applications and Their Functions
These core applications form the backbone of the Microsoft Suite’s functionality, each designed to tackle a specific type of task. Word’s features include advanced formatting, style management, and collaborative editing tools. Excel offers sophisticated formulas, charting capabilities, and data analysis tools. PowerPoint facilitates visually compelling presentations with animation, transitions, and multimedia integration. Finally, Outlook provides a centralized hub for managing communications and scheduling.
History and Evolution of the Microsoft Suite
The evolution of the Microsoft Suite began in the early 1980s with the introduction of Multi-Tool Word for Xenix, a precursor to Microsoft Word. Over the years, the suite has undergone numerous revisions and expansions, adapting to changing technological landscapes and user needs. The introduction of Windows significantly impacted the suite’s development, leading to its widespread adoption. Key milestones include the transition from individual applications to an integrated suite, the addition of new applications like PowerPoint and Outlook, and the ongoing development of cloud-based features through services like Microsoft 365.
The suite’s history reflects a continuous process of innovation, driven by the need to provide users with increasingly powerful and versatile tools for productivity. Early versions were characterized by simple text editing and basic spreadsheet functionalities, while modern versions boast sophisticated features like collaborative editing, cloud integration, and AI-powered assistance. The evolution of the suite parallels the development of personal computing itself, reflecting the changing needs of users from basic document creation to complex data analysis and collaborative projects.
Comparing Microsoft Suite Versions

Choosing the right Microsoft Office suite can feel like navigating a maze of options. There are several versions available, each catering to different needs and budgets. Understanding the key differences between these versions is crucial to making an informed decision. This section will break down the features, pricing, and target users of some of the most popular Microsoft Office suites.
The main distinctions between Microsoft Office suites lie in their features, subscription models, and intended users. Generally, the more comprehensive suites offer a wider range of applications and services, justifying their higher price point. Conversely, simpler suites are ideal for basic needs and come at a lower cost. This comparison will focus on three key versions: Microsoft 365 (formerly Office 365), Office Home & Student, and a brief look at standalone Office applications.
Microsoft Suite Version Comparison
The following table summarizes the key differences between three popular Microsoft Office suites. It highlights features, pricing, and the types of users who would benefit most from each version.
| Feature | Microsoft 365 (Example: Microsoft 365 Personal) | Office Home & Student | Standalone Office Applications (e.g., Word, Excel) |
|---|---|---|---|
| Applications Included | Word, Excel, PowerPoint, Outlook, OneNote, Access (some plans), Publisher (some plans), OneDrive cloud storage, Teams | Word, Excel, PowerPoint, OneNote | Individual applications (e.g., only Word or only Excel) |
| Subscription Model | Recurring monthly or annual subscription | One-time purchase | One-time purchase |
| Pricing | Varies depending on plan; generally $7-$15/month or $70-$150/year | Around $150 one-time purchase | Varies depending on the application; typically $150-$250 per application |
| Updates | Automatic updates included | No automatic updates; requires separate purchase for new versions | No automatic updates; requires separate purchase for new versions |
| Cloud Storage | Included (varies by plan, typically 1TB or more) | None included | None included |
| Target User | Individuals and families needing regular updates, cloud storage, and collaboration features; businesses needing collaborative tools | Students and home users needing basic office productivity tools for a one-time purchase | Users needing only specific applications (e.g., only Word for writing) and prefer a one-time purchase |
Microsoft Word Functionality
Okay, so we’ve covered the basics of Microsoft Word—typing stuff, changing fonts, the whole shebang. But Word’s got aton* more up its sleeve than just basic text editing. We’re talking seriously powerful tools for creating professional-looking documents that’ll impress your professors, bosses, or whoever needs to see your awesome work.Word’s advanced features let you go way beyond simple documents.
Think creating stunning reports with charts and graphs, designing eye-catching newsletters, or even building a professional resume that’ll land you that dream internship. It’s all about leveraging the features to make your documents look polished and professional.
Advanced Features of Microsoft Word
Word offers a wealth of features that go beyond basic text editing. These include advanced formatting options, such as styles and templates, which ensure consistency and a professional look. You can insert various objects like images, tables, and SmartArt graphics to visually enhance your documents. Collaborating with others is made easy through real-time co-authoring. Advanced features like track changes and comments help manage revisions efficiently.
Finally, powerful tools for creating and managing citations and bibliographies make research papers a breeze.
Creating Professional Documents with Microsoft Word
Let’s say you need to create a professional report for a class. You wouldn’t just slap some text onto a page, right? Instead, you’d use Word’s features to structure it logically, using headings, subheadings, and consistent formatting. You’d add visuals like charts to represent data clearly. Imagine a report on climate change: you could use a bar chart to show rising global temperatures over the past century, making your data much more impactful than just listing numbers.
You could also incorporate images of melting glaciers or deforestation to further enhance the visual appeal and understanding. Adding a cover page with a professional design and using page numbers and a table of contents will add to the professional touch. Finally, utilizing consistent fonts and styles across the entire report will contribute to a polished and professional look.
Mail Merge in Microsoft Word
Mail merge is a killer feature for sending personalized letters, emails, or labels to multiple recipients. It automates the process of creating customized documents from a single template.Imagine you’re a small business owner needing to send personalized thank-you notes to all your customers. Instead of typing each note individually, you can use mail merge.First, you create your main document (the letter template) with placeholders for personalized information like the customer’s name and address.
Then, you create a data source, usually a spreadsheet (like an Excel file) containing the customer information. This spreadsheet would have columns for Name, Address, City, State, Zip Code, etc. For example, a sample data set could look like this:
| Name | Address | City | State | Zip Code |
|---|---|---|---|---|
| John Doe | 123 Main St | Anytown | CA | 91234 |
| Jane Smith | 456 Oak Ave | Springfield | IL | 62704 |
| Peter Jones | 789 Pine Ln | New York | NY | 10001 |
Word then combines your template with the data source, generating a personalized letter for each customer. It’s a huge time saver, and it ensures that each recipient gets a unique, professional-looking communication. This avoids the impersonal feel of a mass-produced email.
Microsoft Excel Capabilities
Excel is way more than just a spreadsheet program; it’s a powerful data analysis and visualization tool. Its core strength lies in its ability to manipulate data using formulas and functions, create insightful pivot tables, and generate compelling charts and graphs. This section will explore these key capabilities.Excel’s functionality hinges on its robust formula and function system. These allow users to perform complex calculations, automate tasks, and extract meaningful insights from data.
From simple addition to sophisticated statistical analysis, Excel provides a vast library of pre-built functions, making data manipulation accessible to users of all skill levels. This empowers users to move beyond simply storing data and instead actively analyze and interpret it.
Formulas and Functions in Excel for Data Analysis
Formulas are the backbone of Excel’s data analysis capabilities. They allow you to perform calculations on data within your spreadsheet. A formula always begins with an equals sign (=) followed by the calculation you want to perform. For example, `=A1+B1` adds the values in cells A1 and B Excel offers a vast library of functions, which are pre-built formulas that perform specific calculations.
These range from simple functions like `SUM`, `AVERAGE`, and `COUNT` to more complex ones like `VLOOKUP`, `IF`, and statistical functions such as `STDEV` and `AVERAGEIF`. Using functions dramatically increases efficiency and reduces the risk of errors compared to manual calculations. For instance, `=AVERAGE(A1:A10)` calculates the average of the values in cells A1 through A10. More complex functions, like `VLOOKUP`, allow you to search for specific values within a dataset and return corresponding information from another column.
This is extremely useful for tasks such as looking up product prices based on product codes.
Creating Pivot Tables in Excel
Pivot tables are a powerful tool for summarizing and analyzing large datasets. They allow you to quickly aggregate and filter data, revealing trends and patterns that might be difficult to spot in a raw data table.
- Select your data: Highlight the entire dataset you want to analyze, including headers.
- Insert PivotTable: Go to the “Insert” tab and click on “PivotTable.” A dialog box will appear, allowing you to choose where you want to place the PivotTable (a new worksheet or the existing one).
- Drag fields to areas: The PivotTable Fields pane will appear. This pane contains all the columns from your data. Drag the fields you want to analyze into the different areas:
- Rows: Fields that will categorize your data (e.g., product category).
- Columns: Fields that will further categorize your data (e.g., region).
- Values: The fields you want to summarize (e.g., sales, quantity). Excel will automatically summarize these values (usually by summing them), but you can change this to average, count, or other functions.
- Filters: Fields you want to use to filter the data (e.g., date range).
- Analyze the results: Once you’ve arranged the fields, the PivotTable will automatically generate a summary of your data. You can then interact with the PivotTable by filtering, sorting, and changing the summary functions to explore different aspects of your data.
For example, if you have sales data with columns for “Region,” “Product,” and “Sales Amount,” you could create a PivotTable to see total sales by region and product.
Charting and Graphing Tools in Excel for Data Visualization
Excel offers a wide variety of charting and graphing tools to visually represent your data. Choosing the right chart type is crucial for effectively communicating your findings.Different chart types are suited to different data types and analytical goals. For instance, a column chart is excellent for comparing values across categories, while a line chart is better for showing trends over time.
Pie charts are useful for showing proportions of a whole, and scatter plots are ideal for exploring relationships between two variables.To create a chart, select the data you want to visualize, go to the “Insert” tab, and choose the desired chart type. Excel will automatically generate the chart based on your data. You can then customize the chart’s appearance, adding titles, labels, legends, and formatting elements to enhance its clarity and visual appeal.
For example, to visualize sales trends over a year, a line chart would be the most appropriate choice. A bar chart would effectively compare sales across different product categories. A pie chart could showcase the proportion of sales contributed by each product.
Microsoft PowerPoint Presentations

PowerPoint, despite its sometimes-maligned reputation, remains a powerful tool for communication. Mastering its features allows you to create presentations that are not only informative but also engaging and memorable, leaving a lasting impact on your audience. Effective presentations hinge on a clear understanding of design principles and the strategic use of multimedia elements.PowerPoint’s strength lies in its ability to visually communicate complex information.
A well-designed presentation simplifies data, making it easily digestible for viewers and enhancing comprehension. This section will explore best practices for creating presentations that are both visually appealing and effectively convey your message.
Best Practices for Creating Engaging and Effective PowerPoint Presentations
Creating an effective PowerPoint presentation involves more than just slapping together some slides. It requires careful planning and execution, focusing on clarity, conciseness, and visual appeal. Key elements include a strong narrative arc, visually consistent design, and the strategic use of visuals to support your points, not distract from them. Think of it less as a document to be read and more as a visual aid to enhance a spoken presentation.
A good rule of thumb is to limit text per slide; focus on key phrases and impactful visuals.
Effective Use of Animations and Transitions in PowerPoint
Animations and transitions can dramatically improve the impact of your presentation, but only if used judiciously. Overusing them can be distracting and detract from your message. Effective animation highlights key points, guides the viewer’s eye, and adds a touch of dynamism. Transitions should be subtle and consistent, providing a smooth flow between slides rather than jarring shifts. For example, a simple fade transition works well for most presentations, while more elaborate transitions might be suitable for specific, impactful moments.
Think of animation as a tool to emphasize key takeaways; subtle animations are often more effective than flashy ones. Avoid using too many different animation styles on a single slide, as it creates visual clutter and confusion.
PowerPoint Slide Layout for Data Visualization
Data visualization is crucial for conveying complex information clearly and concisely. A well-designed slide effectively presents data without overwhelming the audience. Consider using charts and graphs appropriate for the type of data being presented. For example, bar charts are excellent for comparing categories, while line charts are ideal for showing trends over time. Pie charts are useful for showing proportions of a whole.
Avoid using too many charts or graphs on a single slide, and always ensure that your visuals are clearly labeled and easy to understand. A simple, clean design with a clear visual hierarchy will help your audience focus on the key data points. For instance, a slide showing sales figures over a quarter might use a line chart with clear labels for months and sales amounts, perhaps highlighting a peak sales period with a distinct color or annotation.
Keep the color palette consistent and avoid overwhelming the slide with too much information.
Microsoft Outlook Email Management
Outlook is more than just an email client; it’s a powerful productivity tool that can significantly improve how you manage your inbox and schedule. Effective email management is crucial for maintaining focus and avoiding information overload, and Outlook provides a robust suite of features to help you achieve this. Mastering these features can dramatically boost your efficiency.Effective email organization and management in Outlook hinges on several key strategies.
Okay, so you’re all set with your Microsoft Suite, right? Word docs, Excel spreadsheets, PowerPoint presentations – the whole shebang. But sometimes, even with all that productivity, your PC gets bogged down. That’s where a good pc cleaner comes in handy to keep things running smoothly. After a quick clean, you’ll be back to creating killer Microsoft Suite projects in no time!
A well-organized inbox is the foundation of efficient email management. This involves creating folders to categorize emails by project, client, or topic, enabling quick retrieval of specific messages. Utilizing Outlook’s search function, which supports sophisticated Boolean operators, also streamlines the process of finding needed information. Regularly archiving or deleting old emails prevents your inbox from becoming cluttered and sluggish.
Furthermore, prioritizing emails based on urgency and importance allows you to focus on time-sensitive tasks.
Outlook Calendar Scheduling and Collaboration
The Outlook Calendar is a versatile tool for scheduling appointments, meetings, and events. It allows users to create recurring events, set reminders, and share calendars with colleagues for improved collaboration. The ability to visually see your schedule, including meetings and appointments, aids in time management and prevents scheduling conflicts. Features like scheduling assistants help find times that work for all participants, and the integration with other Microsoft applications, such as Teams, further enhances collaborative capabilities.
For instance, a team working on a project can share a calendar to coordinate deadlines and meetings efficiently.
Using Outlook Rules and Filters for Automated Email Processing
Outlook rules and filters automate the processing of incoming and outgoing emails, saving considerable time and effort. Rules can be set to automatically move emails to specific folders, flag important messages, or even delete unwanted emails. Filters can be used to sort emails based on criteria like sender, subject, or s. For example, a rule could be created to automatically move all emails from a specific client to a dedicated folder, while a filter could be set to highlight emails containing specific s.
This automated sorting and filtering significantly reduces manual sorting and improves overall email management efficiency. Imagine automatically routing all invoices to a “Finance” folder – this streamlines accounting processes and reduces the risk of missing important documents.
Microsoft Access Database Management
Microsoft Access, a relational database management system (RDBMS), is part of the Microsoft Office suite. It allows users to create and manage databases, from simple contact lists to complex inventory tracking systems, without needing extensive programming knowledge. Understanding its core features is crucial for efficient data organization and retrieval.
Designing and implementing a database in Access involves several key steps. First, you define the tables, which are essentially structured containers for your data. Each table consists of fields (columns) that represent specific attributes, like “Name,” “Address,” or “Order Date.” Data types, such as text, number, date, and yes/no, are assigned to each field to ensure data integrity. Relationships between tables are then established using primary and foreign keys, allowing you to link related data across multiple tables.
For example, a “Customers” table might relate to an “Orders” table through a customer ID, preventing data redundancy and maintaining consistency. Finally, you create queries and reports to access and analyze the data.
Creating Queries
Queries in Access allow you to retrieve specific data from your database based on defined criteria. A simple query might select all customers from a specific city. More complex queries can involve joining multiple tables, filtering data based on multiple conditions, and performing calculations. For example, a query could calculate the total sales for a specific product by joining the “Products” and “Orders” tables and summing the order amounts.
The query design interface in Access provides a visual way to build queries using drag-and-drop functionality. This allows users to easily specify the tables, fields, and criteria for their queries. The resulting query can be saved and reused, making data retrieval efficient and repeatable.
Creating Reports
Reports provide a formatted view of your data, useful for presentations, analysis, or printing. Access offers various report templates and design tools to create customized reports. A simple report might display a list of customers with their contact information. More complex reports could involve grouping data, calculating totals or averages, and incorporating charts or graphs. For instance, a sales report could group sales data by product category and display total sales for each category, alongside a bar chart visualizing the sales distribution.
This allows for easy visual analysis of the data and aids in making informed business decisions.
Data Integrity and Security
Maintaining data integrity and security is paramount. Data integrity refers to the accuracy and consistency of your data. This is achieved through proper data type selection, enforcing constraints (like unique values or required fields), and using input masks to standardize data entry. Data security involves protecting your database from unauthorized access or modification. This can be accomplished by setting passwords to restrict access to the database, using encryption to protect sensitive data, and regularly backing up your database to prevent data loss.
For instance, a database containing sensitive customer information could be protected with a strong password and encrypted using Access’s built-in encryption features. Regular backups to a secure location ensure that even in the event of a system failure, the data can be recovered.
Integration of Microsoft Suite Applications
The power of the Microsoft Suite isn’t just in its individual applications, but in how seamlessly they work together. This integration streamlines workflows, allowing for efficient data transfer and collaborative efforts across different projects. Imagine effortlessly pulling data from an Excel spreadsheet directly into a Word document for a report, or seamlessly incorporating a PowerPoint presentation into an email for a quick and effective communication.
This interconnectedness significantly boosts productivity and reduces the time spent on repetitive tasks.This section will explore the methods for integrating different Microsoft Suite applications, focusing on the practical applications of linking data between Excel and Word, and embedding other applications within Word documents. We’ll provide clear, step-by-step examples to illustrate these processes.
Linking Data Between Excel and Word
Linking data between Excel and Word allows for dynamic updates. Changes made in the Excel spreadsheet automatically reflect in the Word document, eliminating the need for manual updates. This is achieved using the “Object” feature within Word. To link data, you first select the data range in Excel, copy it, then in Word, go to “Paste Special.” From the options, select “Paste Link” and choose either “Microsoft Excel Worksheet Object” or “Microsoft Excel Worksheet.” The former embeds a fully functional spreadsheet within the Word document, while the latter displays only the data range as a linked object.
Any modifications to the source Excel file will immediately update the linked data in your Word document. For instance, if you are creating a sales report in Word, linking the sales data from your Excel spreadsheet ensures your report is always current and accurate.
Embedding Excel Spreadsheets in Word Documents
Embedding an Excel spreadsheet directly into a Word document offers a visually integrated and interactive experience. Instead of just linking data, this method incorporates the entire spreadsheet, allowing recipients to directly interact with the data within the Word document. To embed, copy the Excel spreadsheet, go to “Paste Special” in Word, and select “Paste.” Choose “Microsoft Excel Worksheet Object.” This creates a fully functional, editable spreadsheet within your Word document.
The recipient can then manipulate and even edit the embedded spreadsheet directly, provided they have the necessary permissions. This is incredibly useful for detailed reports, proposals, or any document requiring interactive data analysis directly within the main document. For example, a financial report could include an embedded spreadsheet showcasing detailed financial statements, enabling readers to directly examine the figures.
Embedding PowerPoint Presentations in Word Documents
Similar to embedding Excel spreadsheets, you can seamlessly integrate PowerPoint presentations into Word documents. This is particularly helpful for reports, proposals, or any document where visual aids are crucial. Copy the PowerPoint slide or presentation, then in Word, select “Paste Special” and choose “Paste.” Select “Microsoft PowerPoint Presentation Object.” This embeds the presentation, allowing recipients to view the slides directly within the Word document.
The embedded presentation can be viewed in full-screen mode, and if permissions allow, can even be edited. This functionality is extremely useful for including presentations as supporting material in reports or proposals, providing a dynamic and interactive element to the document. Imagine a marketing proposal with an embedded presentation showcasing the campaign strategy; this enhances the proposal’s impact and clarity.
Microsoft Suite Security and Privacy
Keeping your data safe and private is crucial, especially when using a suite of applications as powerful and widely used as Microsoft 365. This section will explore the security features built into the Microsoft Suite and offer best practices for protecting your information. Understanding these measures is key to maintaining control over your digital life.Microsoft Suite employs a multi-layered approach to security, combining robust infrastructure protection with user-centric features designed to prevent unauthorized access and data breaches.
These features work together to safeguard your documents, emails, and other sensitive information.
Security Features in Microsoft Suite
Microsoft Suite offers a range of built-in security features. These features, often working in concert, provide a strong defense against various threats. For example, multi-factor authentication (MFA) adds an extra layer of security beyond just a password. Data encryption protects information both in transit and at rest, making it unreadable to unauthorized individuals. Furthermore, features like access controls allow users to manage who can view and modify their files.
Regular software updates are also critical; they patch vulnerabilities and keep the system up-to-date with the latest security protocols. Finally, Microsoft actively monitors for threats and responds to security incidents, minimizing potential damage.
Securing Microsoft Suite Accounts
Strong passwords are the foundation of account security. A strong password is long, complex, and unique to each account. Avoid using easily guessable information like birthdays or pet names. Implementing multi-factor authentication (MFA) adds a significant layer of protection. MFA requires a second form of verification, such as a code sent to your phone or email, in addition to your password, making it significantly harder for unauthorized individuals to access your account.
Regularly reviewing your account activity and permissions is also important. Look for any suspicious login attempts or unusual access grants. Enabling automatic updates for all applications ensures that you benefit from the latest security patches. Finally, be cautious about phishing attempts, which often try to trick users into revealing their login credentials.
Recommendations for Maintaining Data Privacy
Maintaining data privacy requires proactive measures. First, only share files and information with trusted individuals and organizations. Carefully review the privacy settings for each Microsoft application, customizing them to control who has access to your data. Be mindful of the information you share online and avoid posting sensitive personal data. Regularly review and update your privacy settings to reflect any changes in your needs or preferences.
Understand the data usage policies of Microsoft and any third-party apps you integrate with the suite. If you’re concerned about specific data points, consider using encryption or other privacy-enhancing technologies. Lastly, be aware of your surroundings when accessing sensitive information on shared devices.
Wrap-Up
So, there you have it – a whirlwind tour through the Microsoft Suite. From its humble beginnings to its current reign as the office productivity king, we’ve explored its core applications, compared different versions, and delved into the powerful features that can transform your workflow. Remember, mastering the Suite isn’t just about knowing
-how* to use the programs, it’s about understanding
-why* certain features are useful and how they can help you achieve your goals.
Now go forth and conquer those assignments, presentations, and emails!
FAQ Resource
What’s the difference between Microsoft 365 and Office 2021?
Microsoft 365 is a subscription service with ongoing updates and features, while Office 2021 is a one-time purchase with limited updates.
Can I use Microsoft Suite offline?
Most Microsoft Suite apps work offline, but online access is needed for some features and to sync changes.
How do I share documents securely with others?
Use Microsoft’s built-in sharing features, setting appropriate permissions to control who can view or edit.
What are some keyboard shortcuts to boost my efficiency?
Ctrl+C (copy), Ctrl+V (paste), Ctrl+Z (undo), Ctrl+S (save) are essential. Explore more app-specific shortcuts online!
Is there a free version of Microsoft Suite?
No, there isn’t a full-featured free version, but there are free online alternatives and limited free trials available.